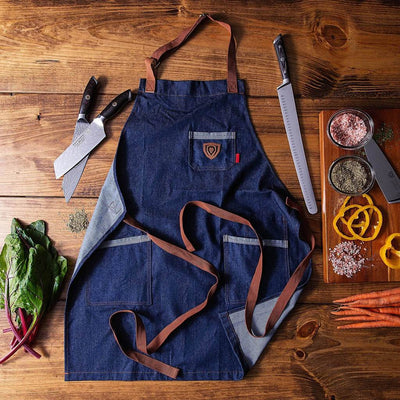
Dalstrong Professional Chef's Kitchen Apron - American Legend
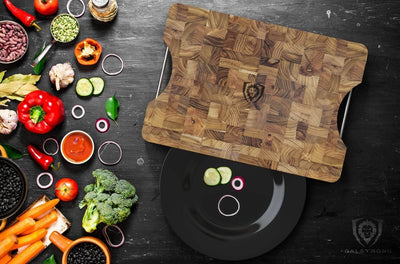
The best way to layer your lasagna is to start with a layer of red sauce, follow it up with a layer of white sauce, then pasta, then cheese. Follow this pattern until you’ve filled your tray.
1. Why We Love Lasagna
What do you think of when you think of “comfort food”? For me, it’s lasagna. There’s just something extremely good, fulfilling, and deliciously wholesome about this delightfully cheesy dish. And it makes sense, since it features layers upon layers of melted cheese, pasta and meat sauce. You couldn’t ask for a better union of fat, carbs, and protein.
More than the qualities of the food itself, lasagna is also one of my favorite dishes because of the childhood connection I have with the dish itself; getting together with my family every Sunday, waiting as the aroma of baked pasta slowly filled the house, finally basking in the tray’s deliciousness when it came out of the oven. It’s this sensorial memory thing, there are few things quite as powerful as that.
Here’s the thing about lasagna: it’s an easy dish to be okay at. What do I mean? Well, any combination of pasta, meat mixture, sauce, and melted cheese is going to be good. So outright making a bad lasagna is not an easy thing to do – even if you mess it up, the end result will likely be something worth enjoying. But making a great lasagna?
Making a great lasagna is more than just putting a recipe together and throwing good quality ingredients into a tray. It’s about understanding the structural integrity of the dish. It’s about knowing what goes where, and how the different layers of this dish are meant to interact together. This is why knowing how to layer lasagna properly is so important. It might be the difference between an incredible lasagna and an utterly mediocre one.
I know, I know – it seems like exactly the kind of thing a pedant who watches too many YouTube videos about cooking would say without a shred of evidence, but it’s true. Knowing how to layer lasagna is an important skill to have, and to prove it we’re going to dive deep into the particulars of what makes a good lasagna. Whether you have your own personal connection with this delectable casserole or not, you can dazzle your friends and family with a well-assembled lasagna.
So let’s start by talking about what the layers are. Make sure to take notes.
 Utility Knife 6" Quantum 1 Series | Dalstrong
2. Best Noodles for Lasagna
This might be a controversial take, but I believe that the very best lasagna noodles are whichever ones you have easiest access to. That is to say: they could be homemade lasagna noodles or they could be store-bought. Store-bought might be a tough pill to swallow for folks, but these days you can find some really high quality stuff in most grocery store shelves.
The point is, the most important thing about cooked lasagna noodles is that they’re cooked properly. If you undercook them you’ll end up with a gross, rubbery, chewy thing that isn’t likely to inspire wholesome family memories in anyone’s mind. If you go the other way and you overcook them you’re affecting your flavor and texture as well.
Overcooked lasagna sheets tend to clump together, or become mushy past the point of being palatable. Cooked noodles should have a bite to them. Keep this in mind when you’re picking the best noodles for your lasagna.
Store-bought noodles
Most traditionally, when you buy lasagna noodles at the grocery store they’ll be the wide, ruffled kind. They’ll also be dried, which means you’ll have to put them in water and boil them prior to assembling the actual lasagna. Make sure to follow the manufacturer’s instructions in the box.
Store-bought “no-boil” noodles
These are another type of store-bought noodles that are even more convenient, as they save you the step of having to go through the boiling part of the process. They are also dried, but they come much closer to the traditional taste and texture of homemade lasagna. However, they still benefit from a quick soak in water.
Homemade lasagna noodles
If you really want to go for broke, you can create your own fresh pasta lasagna noodles. Sure, it’s a bit more time intensive than going with the store-bought stuff, but it’s really not hard at all. All you need is about 14 oz of 00’ flour, 4 large eggs, and 1 egg yolk. Oh, and a pasta machine.
Process:
The first thing you need to do is place the flour on a clean work surface and make a “well” indentation in the middle. Once you’ve done this, you can add in your eggs. Use a fork to whisk the eggs while you slowly incorporate the flour; it will combine and form into a rough dough.
Once you have this rough dough, use your hands to bring it together into a ball shape. Knead the dough ball for about 10 minutes, at which point it should feel smooth and quite pliable. Now wrap the dough in cling film and let it rest at room temperature for 30 minutes.
After 30 minutes, your dough is ready to start rolling out. If you want, you can make the process easier by cutting it in half and flattening it with the palm of your hand so that it can fit through the first (widest) setting of your pasta machine without causing any problems.
Now it’s time to pass the dough through the widest setting in the pasta machine, folding one side over the other and flattening it with the palm of your hand. You’re going to repeat this process four or five times until the dough is ready. And you’ll know it’s ready because it’ll be able to pass through each setting once, first to second last, without any issues.
Your lasagna noodles (or sheets) are ready. Then it’s just the matter of fitting them to your tray, making sure to cut off any excess dough off the sides.
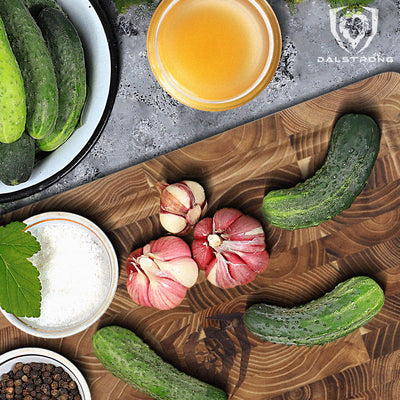
3. Best Sauce for Lasagna
I don’t think most people who’ve been on the internet for more than a single day would be surprised to learn that the topic of “best sauce for lasagne” is surprisingly contentious. People feel extremely strongly about this, and I’ve personally seen even the nicest, most welcoming message boards devolve into an all-out flame war when the topic is broached.
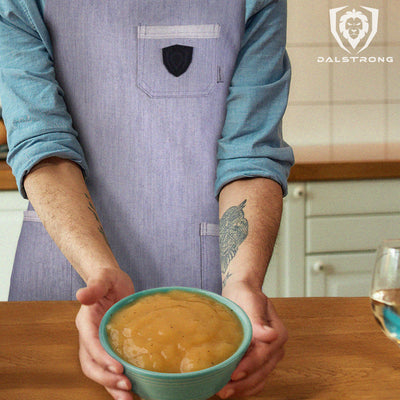
Why is it such a big deal? I’m not sure. If it’s not the specifics of which sauce is the best one for lasagne, it’s the specifics of how the sauce should be made and/or applied. As far as I’m concerned, though, the answer is pretty simple: the best lasagne works with the combination of a red sauce (usually a tomato-based sauce involving meat) and a white sauce (usually bechamel). This is how it’s been since my own parents were children, and this is how it will continue to be for time immemorial.
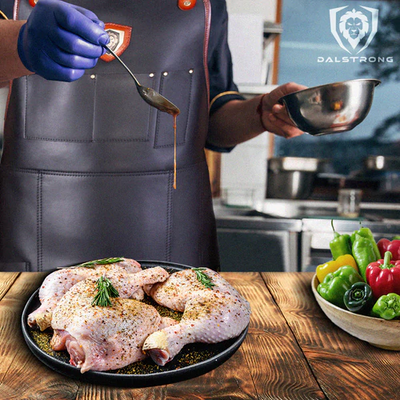
The best red sauce for lasagne is lasagne bolognese, a deliciously meaty tomato-based sauce (often also used as spaghetti sauce). And the best way to make lasagne bolognese sauce is by using passata, which lacks the extreme acidity of the tomato paste or the lumps of chopped tomatoes. Of course, make sure to add in your herbs and spaces; bay leaves, oregano, rosemary, thyme. Lasagne should be generously seasoned.
Others make lasagne with ragu, which is also a great choice for a red sauce. Whatever the case, make sure to give it enough help and time to reach that delicious, rich, comforting flavor.
As far as the white sauce, the classic lasagna choice is bechamel. Yes, you can make lasagne without a white sauce altogether, but it really misses a lot of that contrast. The bechamel sauce also helps keep the lasagne hydrated.
4. Best Cheese for Lasagna
Cheese is one of those magical ingredients for lasagne – it’s the very lifeblood of the lasagne itself. There are various choices for cheeses, and many lasagnas will have more than one type.
If you’re a traditionalist, you’ll likely use Parmesan cheese. However, some people prefer mozzarella or even ricotta cheese. Mozzarella will ensure you have lots of strongly melted cheese, while ricotta adds creaminess. Both cheeses will help make the lasagne soggier than it would’ve otherwise been with just the parmesan cheese.
5. How to Layer Lasagna the Right Way
Okay, so we finally get to the main event. Your ingredients are ready and waiting for you to apply them. You have your baking tray buttered up and ready to go – wait, you don’t have your baking tray buttered up? What’s the matter with you? At least apply some cooking spray. Stop and start again.
You also need to make sure that your baking tray is deep enough. Yes, this sounds silly, but a lot of people don’t even realize this is a problem and will end up creating lasagnas that bubble over and burn on the bottom of your oven. A true tragedy.
You want a glass or ceramic casserole dish that’s at least 3 inches (7.5cm) deep, 13 inches (33cm) long and 9 inches (23cm) wide. This will provide plenty of space for your lasagne to cook, allowing for at least three layers of cheese and sauce.
So what is the correct order of layering?
Again – the thing people argue about would surprise you. This topic has also ignited a good amount of debate, but if you try and trim through the noise you start to form a sort of consensus.
- The first thing that goes on the buttered tray is a layer of red sauce. This is so that nothing sticks to the bottom.
- After that, you add a smaller layer of white sauce.
- Then finally a layer of pasta.
- Repeat the process: red sauce, white sauce, pasta.
Do this until the dish is full. And make sure that the very final layer of pasta at the very top is completely covered by either both sauces, or just the white sauce (topped with cheese).
When layering, it’s important to avoid stinginess. Be generous. There is no point in being cheap at this point, Lasagne is a dish of plentifulness. It works best when it flows pretty abundantly.
And finally, to avoid your lasagne drying out, cover the top with foil while it’s baking, then remove it halfway through so that the top can brown nicely.
6. Best Skillets to Fry Ground Beef for Lasagna
Now that we’ve talked about how to layer your lasagna properly, let’s talk about some of the most important tools you need to use to make sure your sauce comes out the best it can. And if you’re going with a bolognese sauce, you’re going to have to fry up some ground beef – let’s talk about skillets.
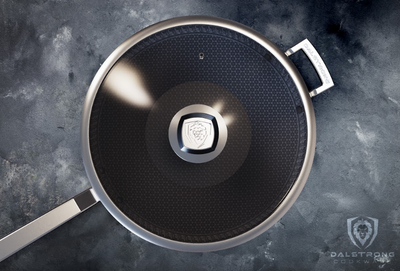
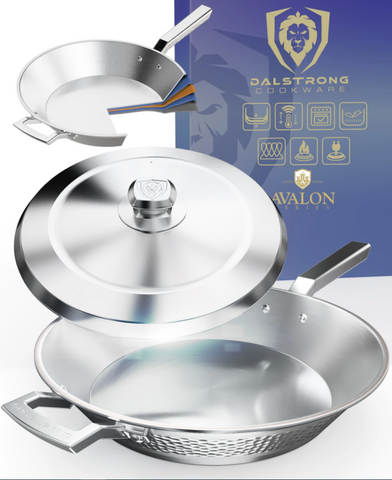
1. 10" Frying Pan & Skillet | Hammered Finish Black | Avalon Series | Dalstrong

This 10” frying pan from Dalstrong’s Avalon series is an excellent choice for its stunning design and for its incredible performance. And yes, both things should matter to you. Having a piece of kitchen gadgetry like a high-end skillet is as much about design as it is about function. Thankfully, with this top-of-the-line product you’re not skimping out on either one.
Pros:
- Features a 5-ply copper forged foundation.
- Excellent heat conductivity, heating 5 times better than iron and 20 times better than stainless steel.
- Heavy gauge cookware, with ultra strong 2.5mm thickness to avoid denting or warping under prolonged heat.
- Also features additional layers of smudge-free aluminum and 18/10 stainless steel above its copper forged foundation, for added heat conductivity and retention.
Cons:
- This skillet does not feature a nonstick coating, so look elsewhere if that’s what you’re searching for.
- As lovely as it looks, some people may not be fans of the hammered finish look and would prefer a return to tradition when it comes to looks.
2. 10" Frying Pan & Skillet | Silver | Oberon Series | Dalstrong

This frying pan looks and also serves the part, a fantastic choice for any kind of home cook – whether you’re a seasoned pro who’s been honing their skills for a long while, or a relative newbie to the culinary scene.
Pros:
- Stunning 3-ply aluminum cladded cookware with great conductivity.
- With its cladding technology, it fuses additional thick gauge layers of nonreactive 18/20 stainless steel, which is great for browning and braising foods.
- An extremely durable pan that can last for generations.
-
Versatile, eye-catching, but timeless design.
Cons:
- If you’re looking for something with a bit more visual panache, check out the 10” frying pan from the Avalon series above.
- Again, this pan does not feature a nonstick coating…
3. 12" Frying Pan & Skillet | ETERNA Non-stick | Oberon Series | Dalstrong

… but this one does. Not only does this 12” frying pan from Dalstrong’s awesome Oberon series give you enough space to comfortably brown your ground beef for a delicious meaty sauce.
Pros:
- Great 3-ply aluminum core cladded cookware, helps you create magic in the kitchen.
- Features top-of-the-line Eterna non-stick coating, which is both PFOA and APEO free.
- Features additional thick gauge layers of 18/10 stainless steel, great at browning and braising foods.
- The Eterna nonstick technology has been tested to last 26 times longer than the leading competitor brand in the Dry-Egg test.
Cons:
- After prolonged use, the handle might get a little bit hot, but never to the point where it’s uncomfortable.
- 12” might be a little large for some home cooks; check out some of the other smaller options available in this series.
4. 12" Skillet Frying Pan - Hammered Finish - Silver - The Avalon Series
Another unbelievable entry in Dalstrong’s Avalon series, blending fantastic design with comfort and performance. This frying pan just exudes elegance, with its luxurious appearance and hammered finish.
Pros:
- 5.ply copper forged foundation, with premium conductivity.
- Also featured additional interior layers of aluminum and 18/10 stainless steel above which act as cladding
- Fantastic responsiveness to changes in temperature when increasing or decreasing heat, giving you further control.
- Designed for an underhand grip, with an ergonomic and perfectly angled handle for easy food management.
Cons:
- Once again, 12” might be a little large for some hook cooks, ask yourself whether you actually need a frying pan this large.
- There’s no getting around the fact that this is one of the more expensive items in this list. This is a premium-level, top-of-the-line product, so you definitely get what you pay for.
7. Frequently Asked Questions About Lasagna
What is the correct order to layer lasagna?
There’s a lot of discussion around this topic in the lasagna recipe world, but generally most lasagna recipes start with a layer of red sauce, followed by a layer of white sauce, followed by a layer of pasta and cheese. Then you continue with this layering until you have completely filled your tray.
Why do you put eggs in lasagna?
Some people add egg to their ricotta cheese mixture in order to bind the cheese so it doesn’t ooze out of the casserole when it’s first cut. Some people swear by this ricotta mixture.
How many layers do you need for lasagna?